
Introduction
What will you find inside this guide?
What Is OpenClaw, in Simple Words?
What Do You Need Before You Start?
Not much, honestly. The official docs ask for Node.js version 22.12.0 or newer, which is the runtime OpenClaw is built on. The install script handles most of this for you, but it helps to check upfront.
Check your Node.js version (Mac/Linux terminal, or WSL terminal on Windows):
node –versionIf the number shown is below 22.12.0, go ahead and update first before going further. Researchers tied older versions to known, already-fixed vulnerabilities.
Here’s what you’ll need:
- A computer, a small home server, or a cheap cloud server or simply a spare laptop which you can leave running.
- About 30 to 60 minutes of free time for the first setup.
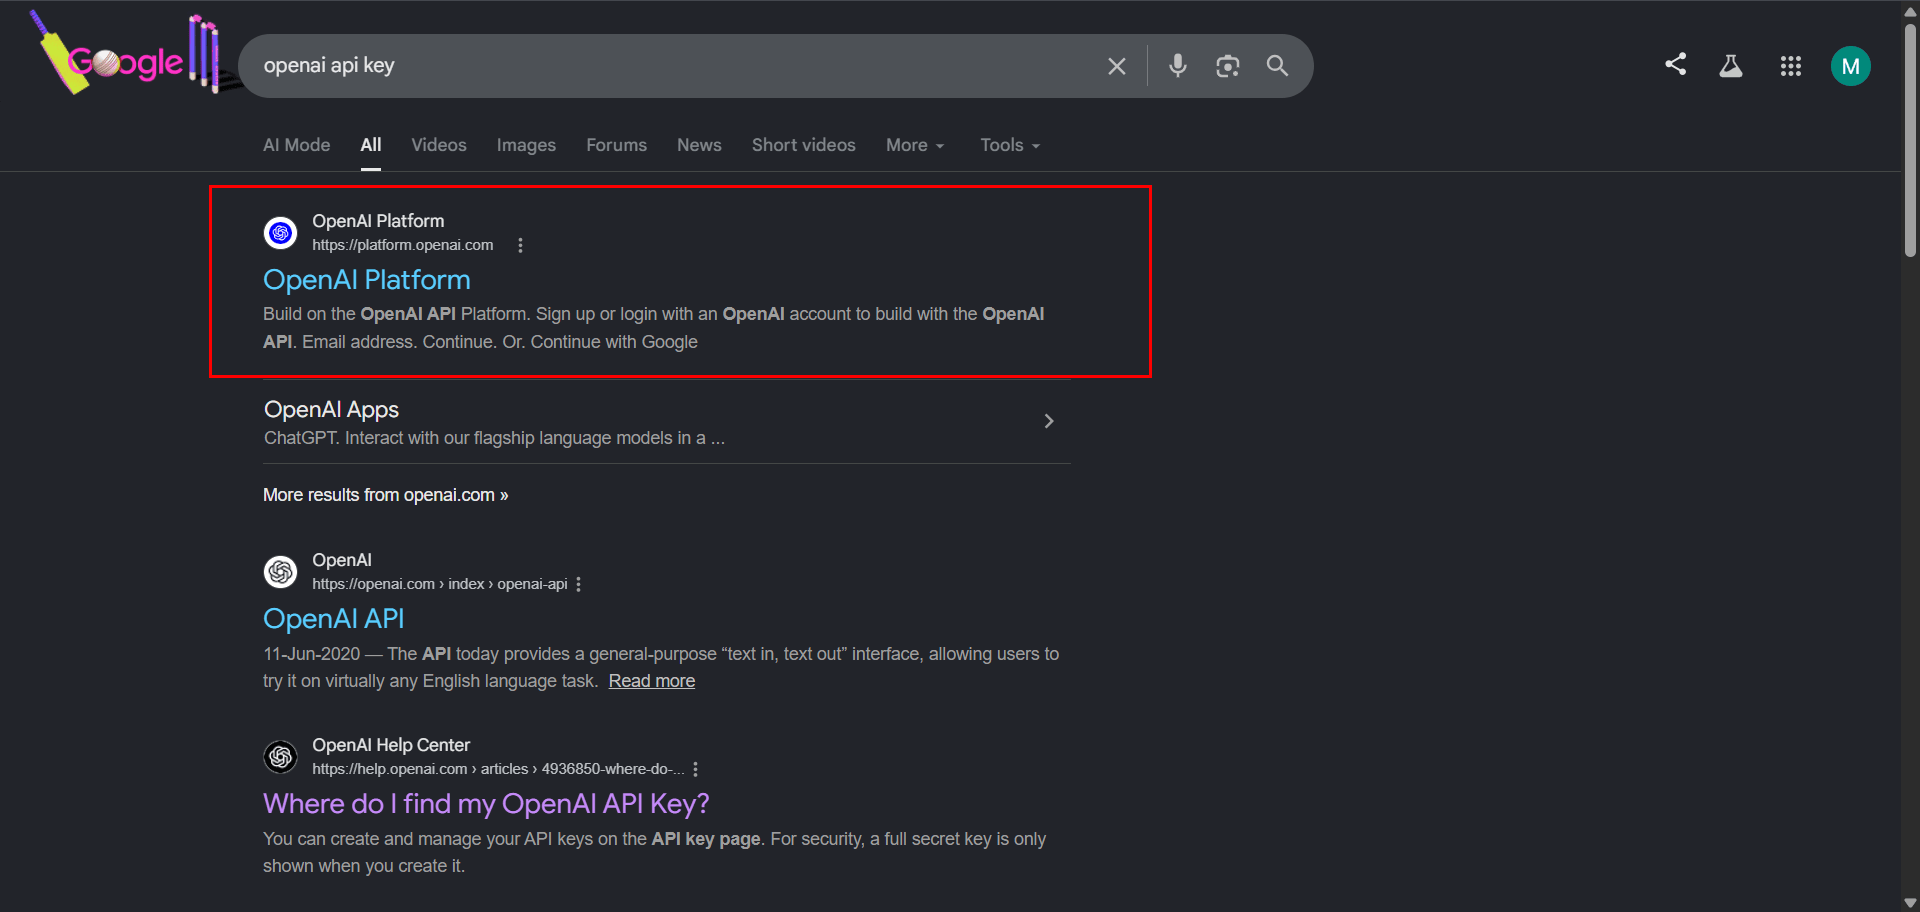
- An API key from an AI provider of your choice. The setup wizard will ask for it.
Why am I using WSL instead of installing natively on Windows?
Step 1: Install OpenClaw
On Mac or Linux
Open your terminal and paste this one line. It downloads and installs everything:
curl -fsSL https://openclaw.dev/install.sh | bashOn Windows
OpenClaw runs inside WSL2, the Linux layer that you can run inside Windows 10 and 11. Setting it up takes two minutes.
wsl –install -d <linux-version>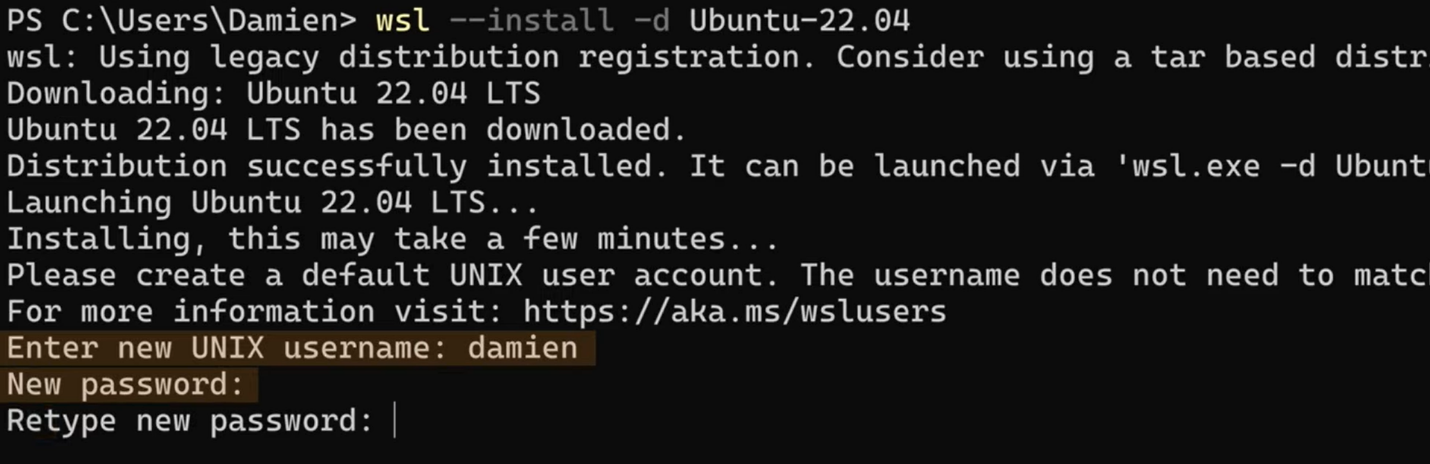
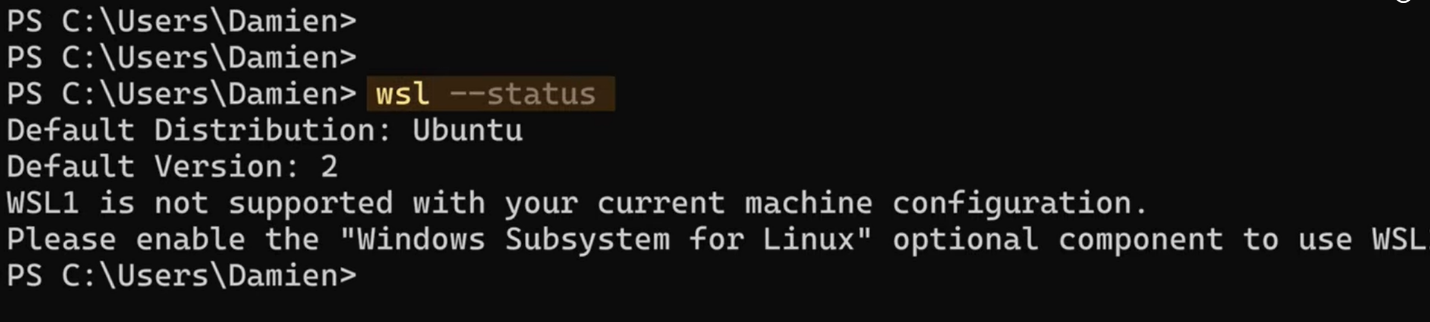
Open the new Ubuntu app from your Start menu, create a username and password. Restart your PC when asked and after restart, check the wsl status
From this point on, whenever I say: run this in your terminal, Windows users should run the commands inside that Ubuntu (WSL) window.
To open your Linux environment from any PowerShell window:
wslThat's it. One word drops you into Ubuntu, right inside the same window. You can also launch it by typing "Ubuntu" in the Start menu, both routes land in the same place

The commands from this point on are the same for mac and windows users.
Now, run the following command to install openclaw:
curl -fsSL https://openclaw.dev/install.sh | bash
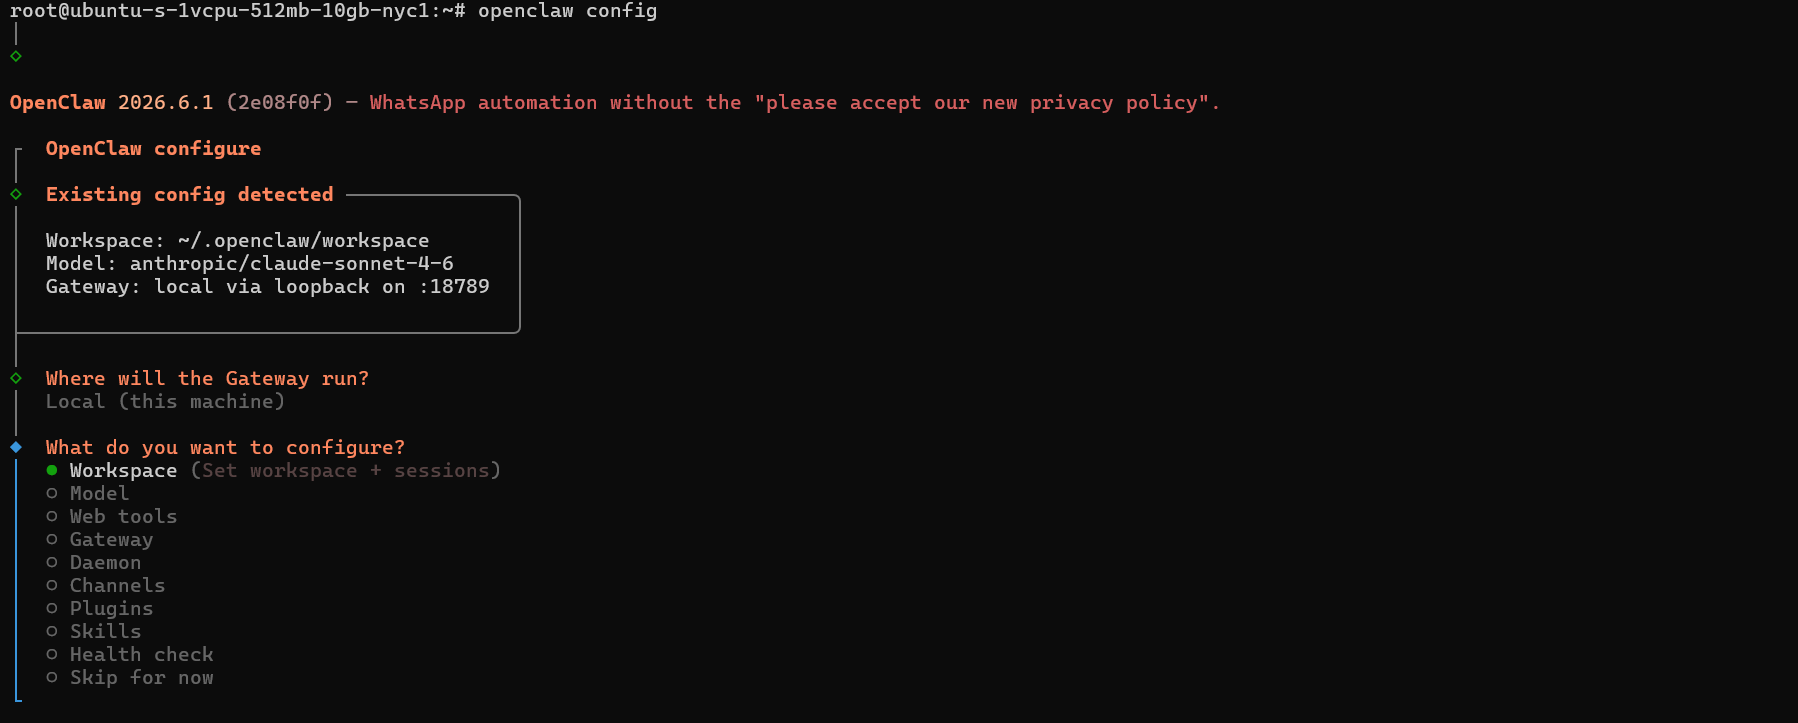
Step 2: Run the Setup Wizard
OpenClaw ships with an onboarding wizard that configures your AI model, security token, chat channels, and background service in one guided flow. Run:
openclaw onboard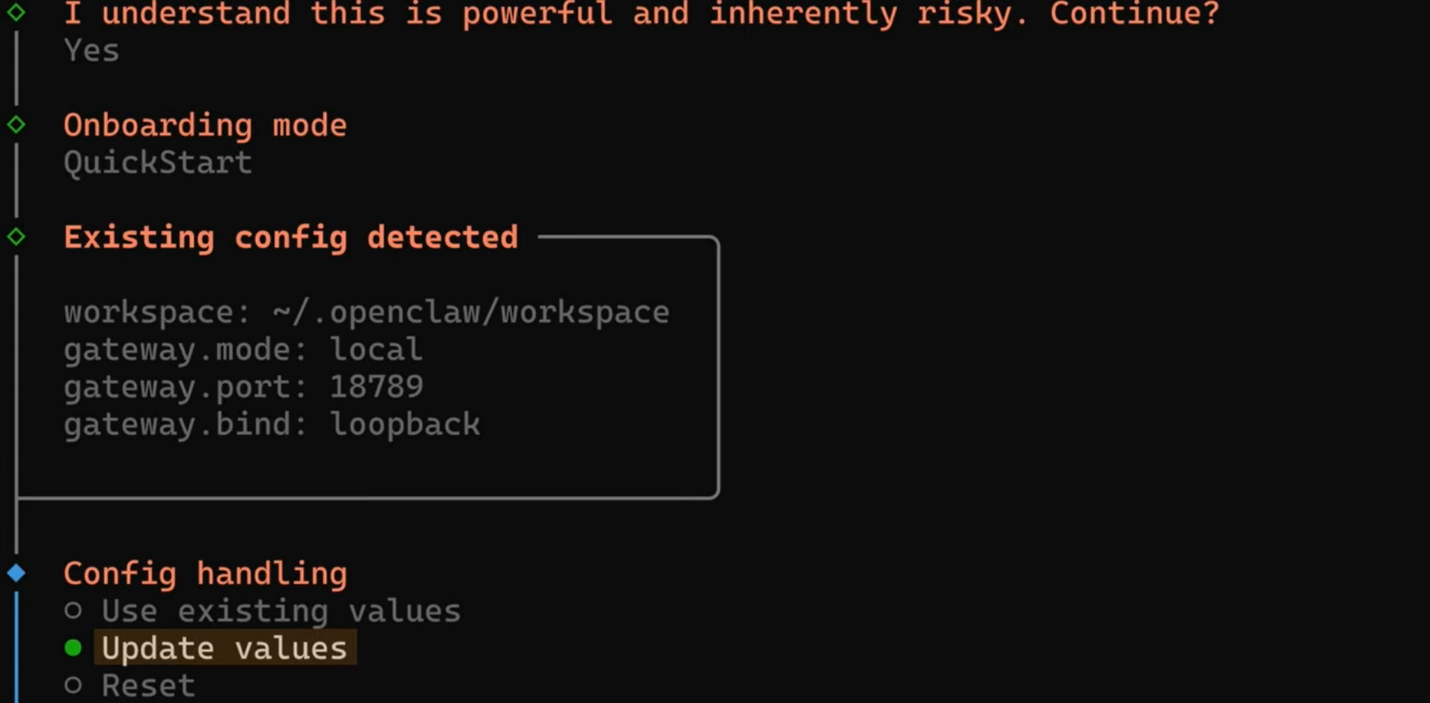
The wizard asks three things:
- Pick your AI model. Choose the provider you have an API key for, and paste the key when prompted.
- Pick your chat apps. Select where you want the assistant to answer you.
- Accept the security token. The wizard creates one for you. Store it for later.
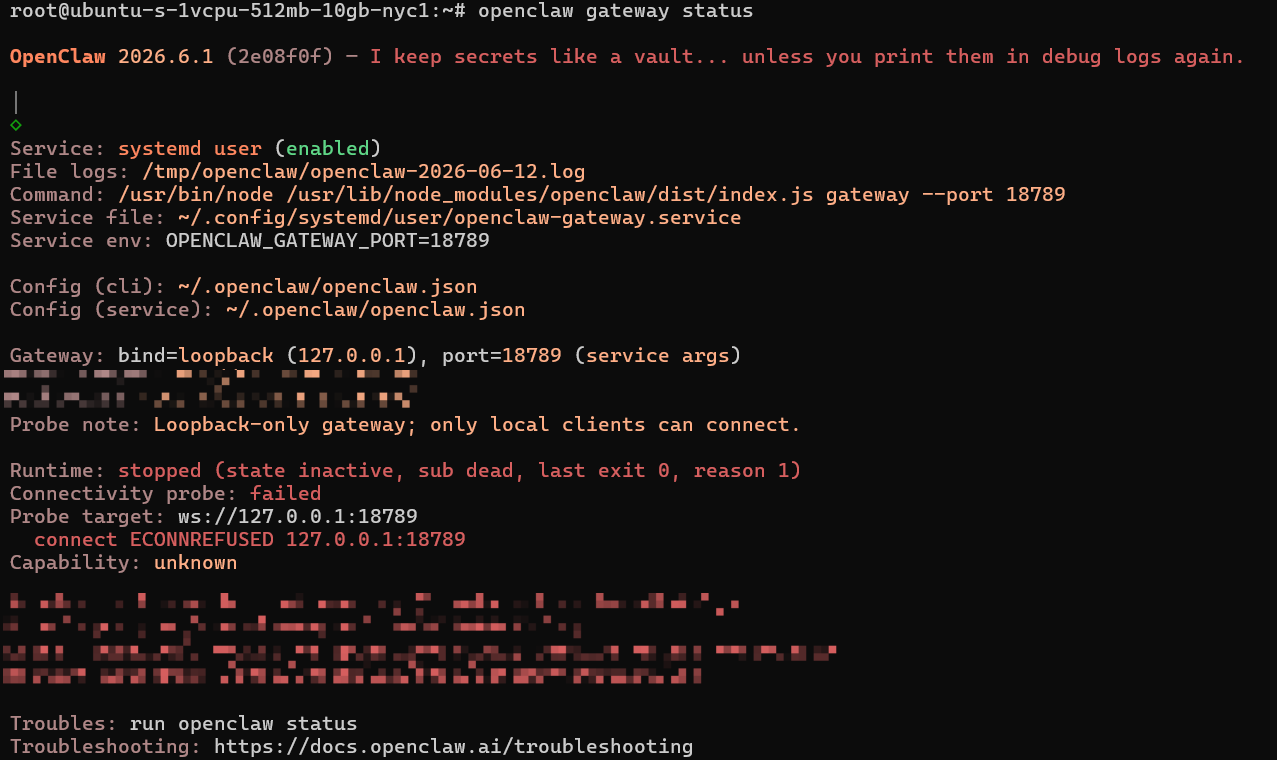
Step 3: Start the Gateway
The Gateway is a part of OpenClaw that stays running and routes messages between your chat apps and the AI. After you’ve installed the service in Step 2, it should already be running. To check the status, use the following command.
openclaw gateway status
Not running? Give it a hard push:
openclaw gateway --port 18791 --verboseOr simply run:
openclaw gatewayYou can now open a browser on the same machine and visit http://127.0.0.1:18791/ to see the control panel.
One important note: The panel should ONLY be reachable from your own machine. We will come back to the why part (for this) in the security section.
Step 4: Connect Your First Chat App
Each chat platform gives you a bot token from its developer settings page.
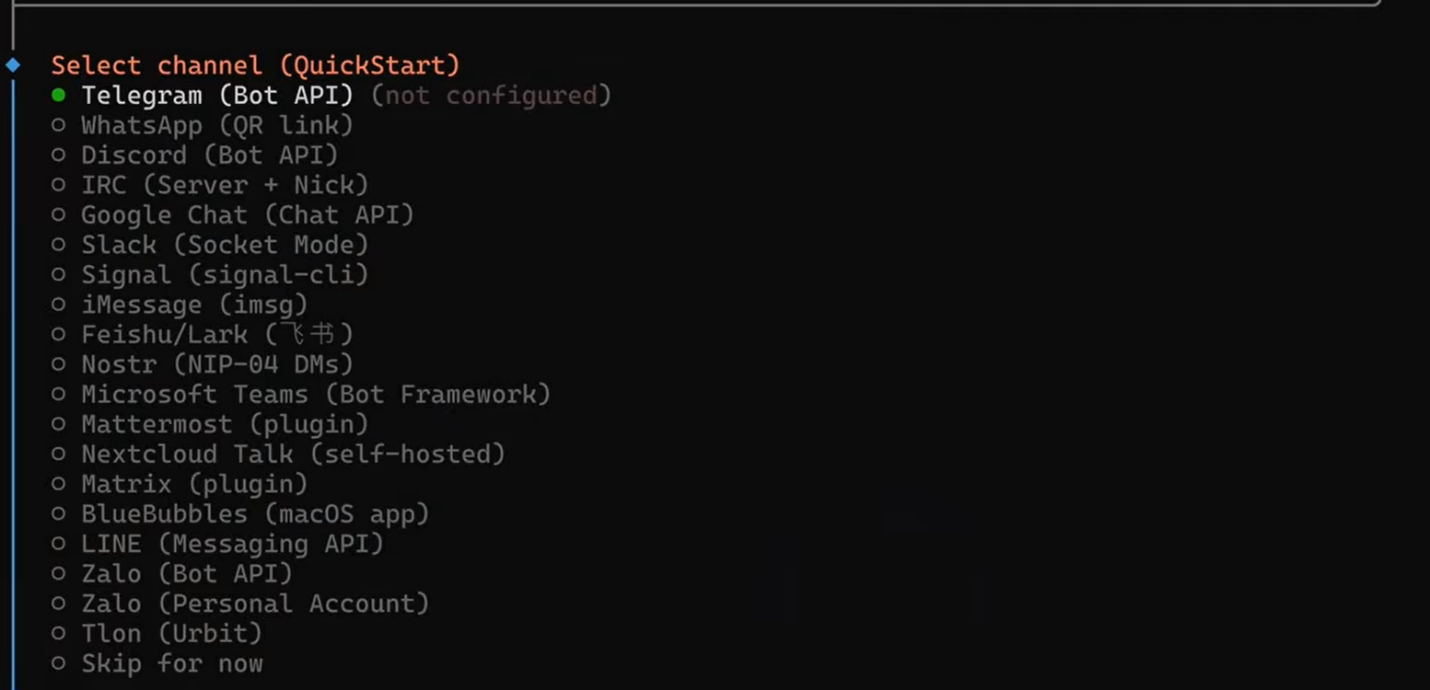
You can either use the following command or you can do it using the Openclaw config command.
openclaw channels add <your-chat-app>Replace <your-chat-app> with the channel name the wizard showed you. Paste the bot token when prompted, and you are connected.
Step 5: Approve Your First Message (Pairing)
Here is a nice safety feature. OpenClaw will not talk to strangers. The first time you message using a connected chat app, it generates a pairing code instead of replying. You approve that code from your terminal, which proves the person messaging the bot is actually you.
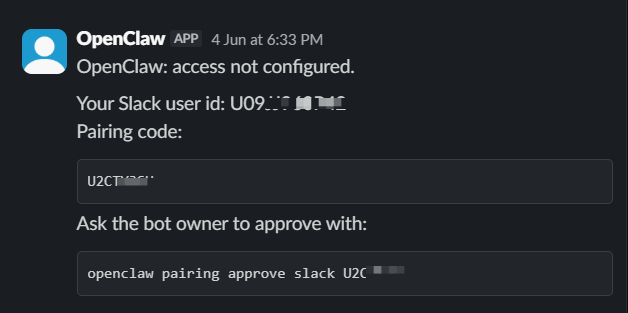
openclaw pairing approve <your-chat-app> <code>After approving, open a new chat in the chat app and write something simple like “What's the weather today?” If openclaw replies, congratulations. The base setup is done.
Now, it’s time for the fun part!
How Do You Add Your Own Skills?
Skills are how you teach OpenClaw new tricks. There is a public marketplace of community skills, but you do not have to trust it. In early 2026, a campaign, nicknamed ClawHavoc, planted 341 malicious skills on that marketplace to steal credentials.
Writing your own skills is safer, and honestly easier than it sounds. A skill is just a folder with one text file inside.
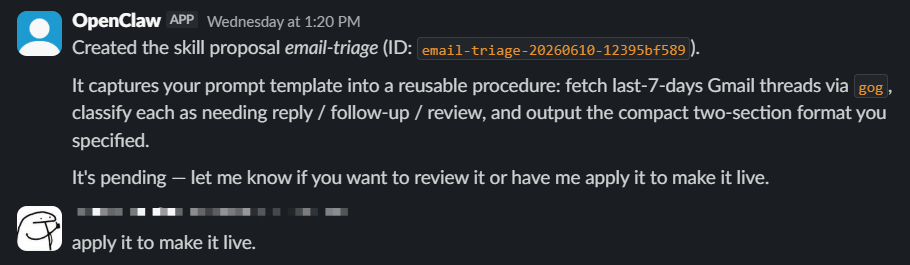
We can use AI to write, store and use skills for us. Once the app is set up, simply prompt it to write a skill for a use case and watch it will do the rest. Choose whichever approach appeals to you.
This is how it will look like once the skill has been created:
Create the folder structure
Each skill lives in its own folder inside ~/.openclaw/skills, and each folder needs a file called SKILL.md. The squiggle symbol ~ just means your home folder.
Mac/Linux (and Windows inside WSL):
mkdir -p ~/.openclaw/skills/my-first-skill
nano ~/.openclaw/skills/my-first-skill/SKILL.mdThe nano command opens a simple text editor right in the terminal. Type or paste your skill content, then press Ctrl+O to save, Enter to confirm, and Ctrl+X to exit. If you prefer a normal editor on Windows, your WSL files are also visible in File Explorer under the “Linux” section in the sidebar, so you can edit SKILL.md with any editor you like.
Write the SKILL.md file
Every SKILL.md starts with a small header block that tells OpenClaw the skill's name and what it does. Keep it short:
---
name: my-first-skill
description: "Summarizes my unread messages every morning"
---
Instructions for the skill go here, written in plain language.The bug that wastes everyone's afternoon
Pay close attention here, because this exact issue has eaten hours of debugging time for users. If your description line contains certain characters, like square brackets, and it is not wrapped in quotes, OpenClaw silently skips the whole skill. No errors. No warning.
description: This is the [task] <-- skill gets silently skipped
description: "This is the task" <-- this worksEnable the skill in your config
Next, tell OpenClaw the skill exists. Open the main config file at ~/.openclaw/openclaw.json and add an entry for each skill. If a skill needs a password or API key for some service, you put it in the env section.
You can also ask OpenClaw to handle it, but do not share secrets or credentials in chat. Most skills do not require API keys.
Confirm the skills registered
openclaw skills list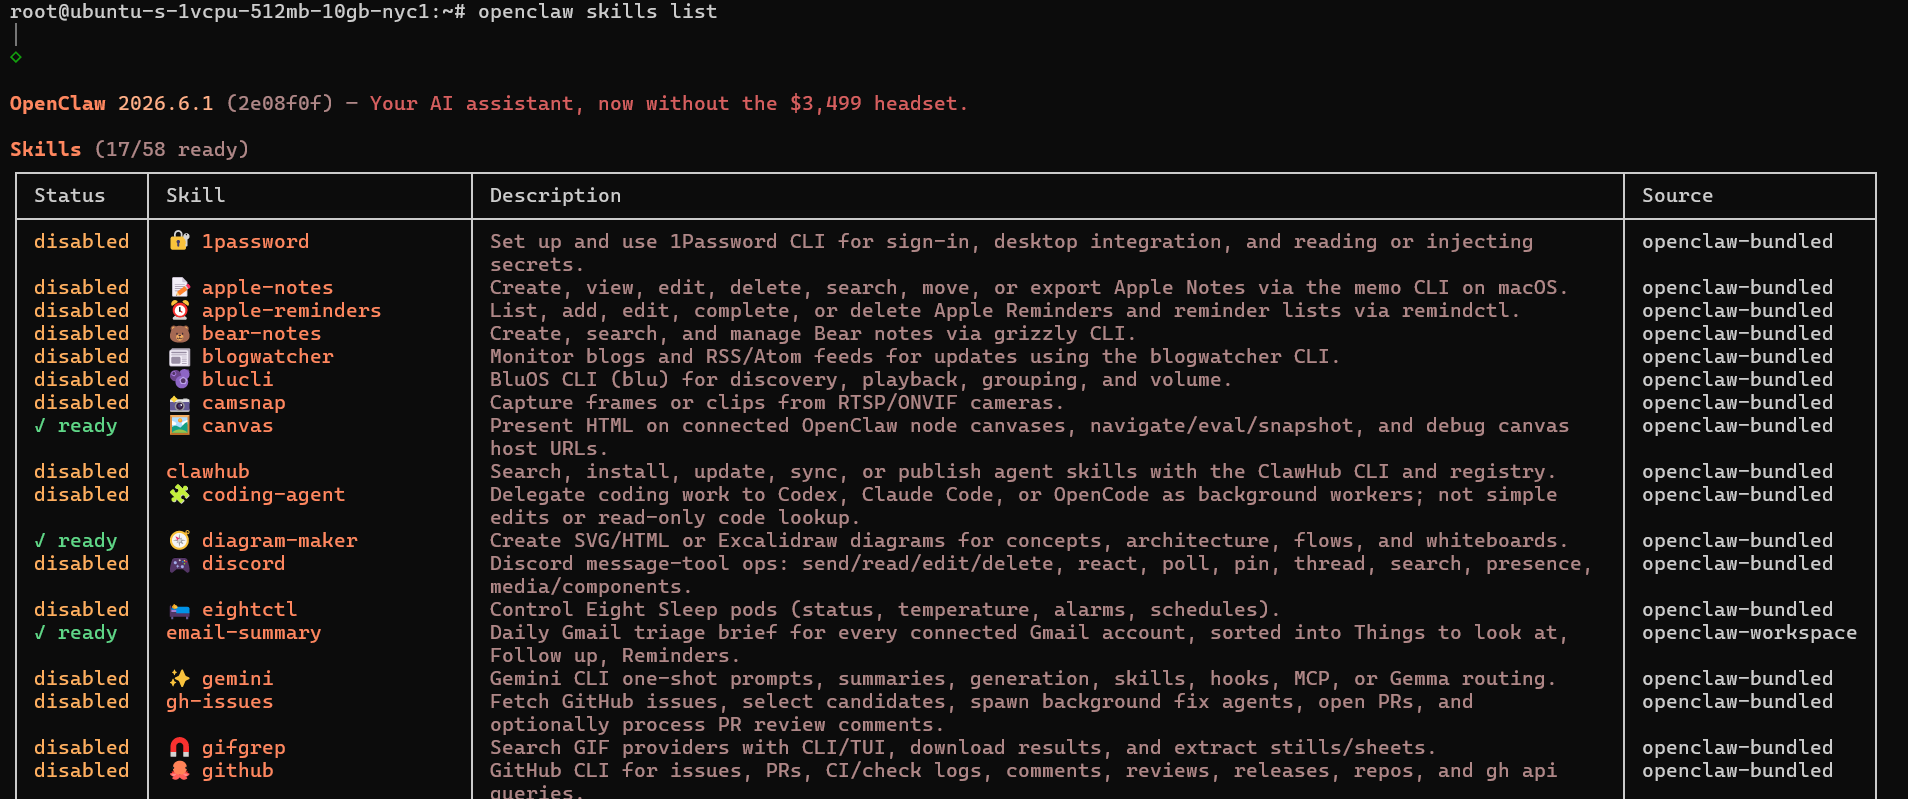
Every skill you created should appear in that list. If one is missing, check the quotes on its description line first. This small check fixes it nine times out of ten.
Skill Creation Prompt Example:
Create a skill that checks my email once per day and forwards only relevant messages that mention “Snowflake” to *********@gmail.com.
Requirements:
- Run on a daily cron schedule.
- Search my inbox for emails where the subject or body contains “Snowflake” (case-insensitive).
- Do not forward promotional, marketing, newsletter, spam, or advertising emails.
- Forward the email only if it is a normal human-written or operational message.
- Preserve the original email content and formatting as much as possible.
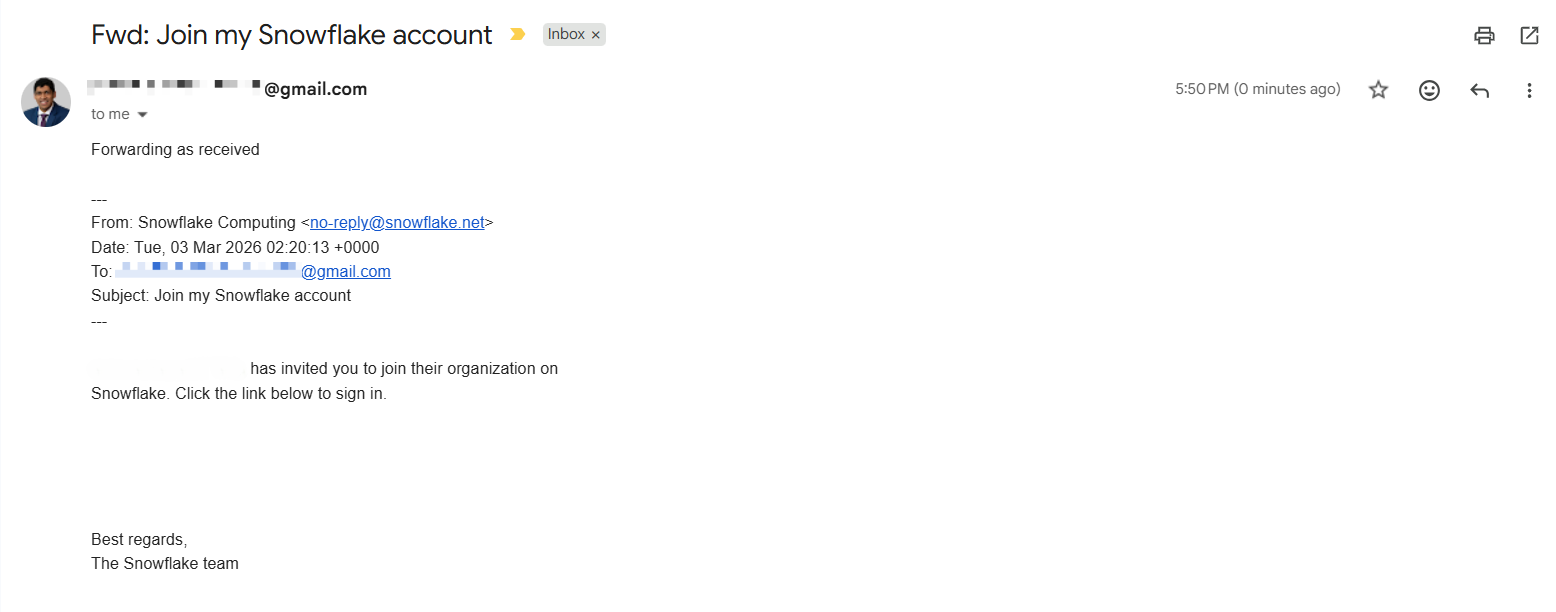
- Prepend the forwarded message with this exact tag line at the top: “Forwarding as received”
- Avoid forwarding the same email more than once.
- Log which emails were forwarded and which were skipped, with a short reason for each skip.
- Before enabling live forwarding, do a dry-run or test pass and report what would be forwarded.I simply pasted this prompt into the chat, and OpenClaw created the skill for me. It also set up a cron job to run the skill automatically every day.
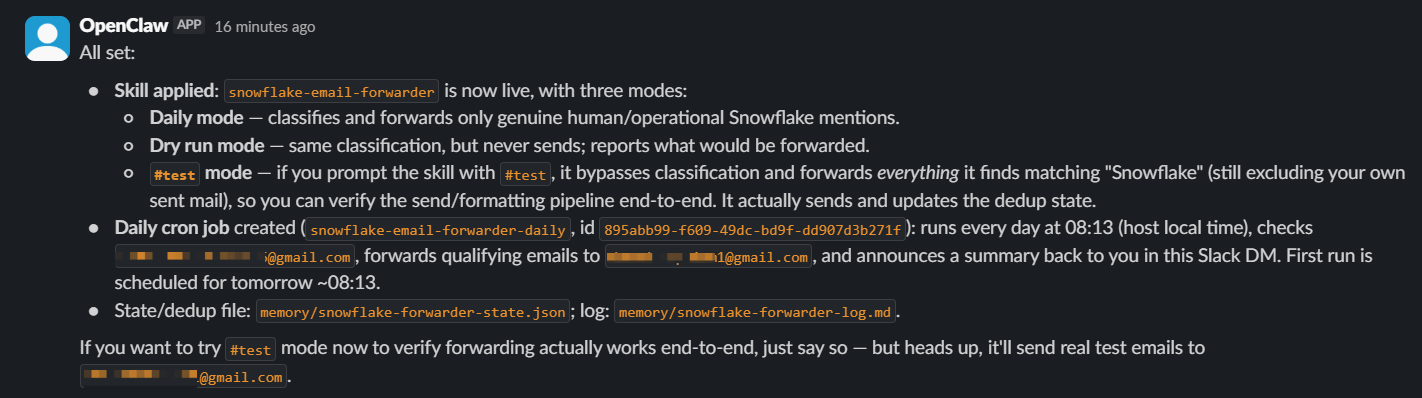
When the scheduled run executed, the skill produced the email in my desired format.
Common Problems and How to Fix Them
Problem 1: A skill does not show up
Covered above, but worth repeating because it is so common. Wrap the description in quotes, save, and check openclaw skills list again. Restarting the gateway alone will not fix it.
Problem 2: The agent keeps timing out
Timeouts usually mean one of three things.
- First, if you are running a local AI model, the local model server may simply not be running. Check that before anything else.
- Second, the model may be too slow for the job. Complex multi-step tasks need a faster or smaller model, and swapping the model in your config often fixes runs that keep dying.
- Third, the context window may be too small.
Problem 3: Runs stop because the context window is too low
The context window is how much text the model can hold in its head at once. If it is set too low, long tasks get cut off mid-run. Raise the context Window value in the models section of openclaw.json. One caveat from real-world testing: some local model servers ignore the value in this file, so you may need to raise the limit inside the model server's own settings too.
Problem 4: A scheduled job ran but returned an error
Scheduled jobs depend on outside services, and outside services have rate limits, which are caps on how many requests you can make per day. In the documented test, a morning job failed simply because a search API hit its daily limit. Check the error log, find which service complained, and either slow your schedule down or raise your plan's limit.
Also, one small warning: the jobs.json file inside the cron folder is managed by OpenClaw itself. Do not edit unless you know what you’re doing.
Useful Commands You'll Keep Coming Back To
You do not need to memorize the whole CLI. In practice, a small set of commands covers almost everything you will do day to day.
|
Command |
What it does |
|
openclaw config |
Opens your configuration so you can view or change settings without digging for the openclaw.json file by hand. |
|
openclaw onboard |
Re-runs the setup wizard. Handy when you want to add a new chat channel, change providers, or redo a step you rushed through the first time. Nothing is one-shot; you can always run it again. |
|
openclaw models set <provider/model-name> |
Switches which AI model OpenClaw uses, in one line, without editing any config file. Very useful when a task keeps timing out and you want to try a faster model. |
|
openclaw gateway status |
Tells you whether the engine room is running. If the bot goes quiet, check this first. |
|
openclaw skills list |
Shows every skill OpenClaw has actually registered. If a skill you created is missing here, it is not going to run, no matter what your config says. |
|
openclaw channels add <chat-app> |
Connects a new messaging app. You will be prompted for that app's bot token. |
|
openclaw pairing list <chat-app> |
Shows pending pairing codes from people who messaged your bot and are waiting for approval. |
|
openclaw pairing approve <chat-app> <code> |
Approves a pairing code so that person can talk to your bot. |
|
openclaw doctor |
Runs a health check across your setup and point out anything misconfigured. Great first move when something feels off but you are not sure what. |
|
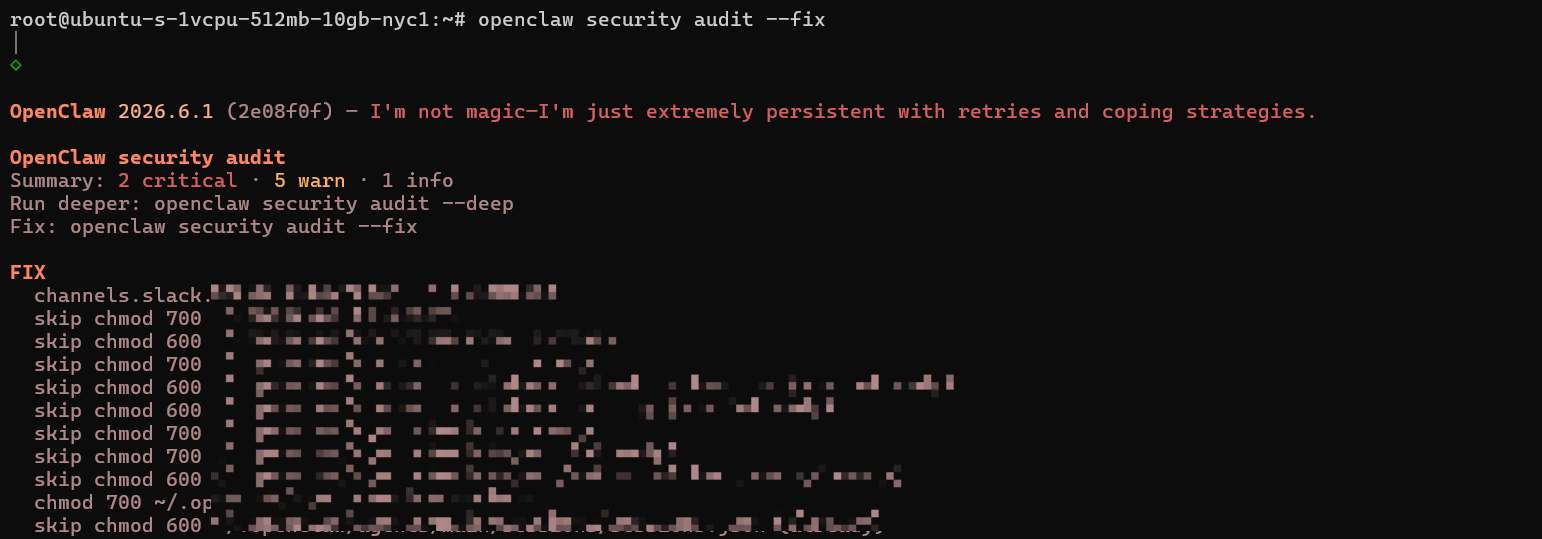
openclaw security audit --fix |
Scans your setup for common security gaps and fixes the easy ones automatically. Worth running once after setup and after big changes. |
Two of these deserve a little more detail, because you will use them constantly.
openclaw config
is your control room. Instead of remembering where the config file lives and what its structure looks like, this command gets you straight to your settings. Model options, gateway options, skill entries, all of it.
openclaw gateway status
gives you a live snapshot of your gateway. Instead of digging through logs or config files, this command shows what’s running, what models are available, which providers are connected, and whether your gateway is healthy. It's the quickest way to verify that OpenClaw can reach the services it depends on.
A Quick Word on Security
Security is not the topic of this guide, but I cannot send you off without two minutes on it. Researchers found tens of thousands of OpenClaw setups exposed online in early 2026, mostly running default settings. The basics protect you from being one of them:
- Keep the gateway private. In your config, the gateway should bind to
127.0.0.1(only your machine can reach it), never0.0.0.0(the whole internet can). - Keep pairing mode on. It is on by default. It is the reason strangers cannot talk to your bot.
- Run the built-in audit once: openclaw security audit --fix handles the common gaps automatically.
- Be picky about community skills. Check who wrote a skill before installing it, or better, write your own. It is just a folder and a text file, remember?
 That is it. If you ever expose OpenClaw to the wider internet or handle sensitive data with it, go read our dedicated security and hardening guide. For a personal setup on your own machine, the four points above cover you from basic threats.
Wrapping Up
Book a Free 30-Minute Meeting
Discover how our services can support your goals — no strings attached. Schedule your free 30-minute consultation today and let's explore the possibilities.
Book a Free Call